

Contact Lens Care Support
Ready to start wearing contact lenses? We're here to help.
Contact Lens Care Support
Ready to start wearing contact lenses? We're here to help.
Contact Lens Tips
Here are our best contact lens care tips to get you started and on the road to falling in love with your new PRECISION® contact lenses. You got this!
Three Things to Remember
Get in the habit of putting in your contact lenses when you’re getting ready in the morning. Every day gets easier.
Carry a spare pair of contact lenses while you get into the swing of things. You never know what might happen, ya know?
Contact lenses feeling weird? Give your eye doctor a call.

Daily disposable Contact Lenses
With daily disposable contact lenses, there’s no need for lens care. Simply put in a fresh pair in the morning and toss them out at night. Then, start the next day with a fresh new pair.
This would be followed by instructions, like we have below, on how to put contacts in.

Weekly replacement Contact Lenses
PRECISION7® is FDA-approved for daily wear and for 6-night/7-day extended wear. With weekly replacement contact lenses, daily wear requires regular cleaning, disinfecting, and storing in contact lens solution each night.
Replace them weekly with a fresh new pair, or as directed by your eye doctor.

How to Put Contacts In

Step 1
Wash, rinse and dry your hands thoroughly.

Step 2
Place the lens on the tip of your index finger.
Step 3
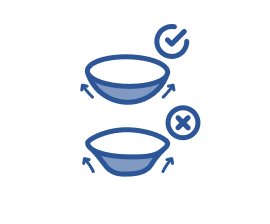
Make sure it’s curved like a bowl. If the ends are flaring like a bell, it’s inside out.

Step 4
Slowly move the lens toward your eye.

Step 5
Use the middle finger of your opposite hand to pull your upper eyelid up, and the middle finger of your other hand to pull your lower eyelid down.

Step 6
Carefully place the lens on your eye.

Step 7
Blink a few times to help the lens settle into place.
Step 8
Slowly move the lens toward your eye.
How to Take Contacts Out
Step 1
Wash, rinse and dry your hands thoroughly.

Step 2
Pull your upper eyelid up and lower eyelid down with your middle fingers.
Step 3
Use your index finger to slide the lens to the lower part of your eye.

Step 4
Pinch the lens between your fingers and remove it from your eye. Repeat for your other eye.
Weekly Lens Care Instructions
Wash and Dry Hands
Start by thoroughly washing and drying your hands to prevent transferring any dirt or oils to your lenses.
Remove Your Lens
Gently remove each contact lens and place it in the palm of your hand.
Clean Your Lens
Apply a few drops of contact lens cleaning solution to each lens. Gently rub the lens with your fingertip to remove any buildup, following the solution’s instructions.
Rinse Thoroughly
Rinse each lens with fresh contact lens solution to remove any remaining debris or particles.
Store in Clean Case
Place each lens in its designated compartment of your clean contact lens case. Fill the compartments with fresh contact lens solution—make sure each lens is fully submerged.
Replace Weekly
After 7 days of wear, discard your current lenses and replace them with a new pair, or follow your eye doctor’s recommendations.
Watch & Learn
Get a Rebate on Your Contact Lens Purchase
Get exclusive rebates on your purchase of Alcon contact lenses. Enjoy 16 hours of outstanding comfort and precise vision while saving money—because your eye care should be as affordable as it is effective.
Get a Rebate on Your Contact Lens Purchase
Get exclusive rebates on your purchase of Alcon contact lenses. Enjoy 16 hours of outstanding comfort and precise vision while saving money—because your eye care should be as affordable as it is effective.

IMPORTANT INFORMATION FOR PRODUCT PRECISION7® (SERAFILCON A) CONTACT LENSES:
For daily wear or extended wear up to 6 nights for near/far-sightedness. Risk of serious eye problems (i.e., corneal ulcer) is greater for extended wear. In rare cases, loss of vision may result. Side effects like discomfort, mild burning or stinging may occur.
Ask your eye care professional for complete wear, care and safety information. 